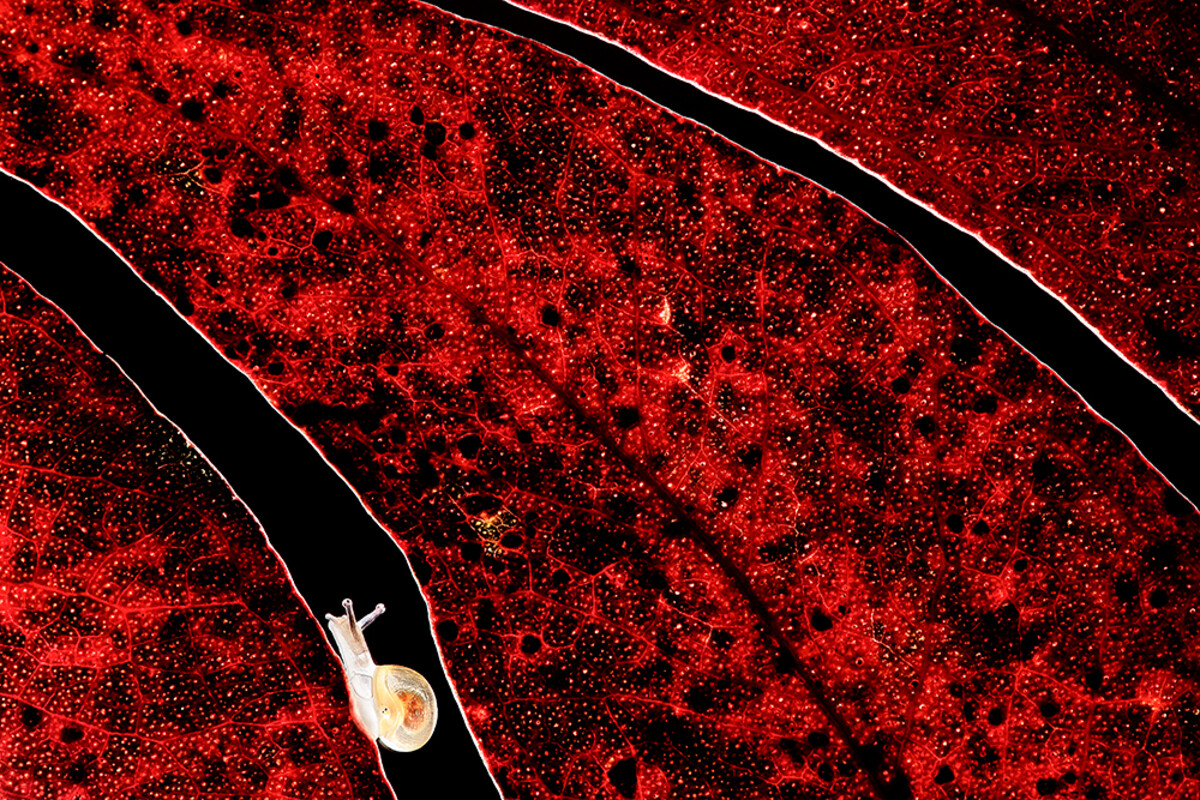
I came up with this photo when I came across this little snail, seeing that the snail shell was practically transparent I immediately knew that I wanted to take a photo against the light to highlight this transparency in the lake. The snail was on some green leaves but when I lit them from behind I was not convinced by the result I was seeing, so I tried some dry leaves that were there next to it. I re-illuminated these leaves from the back and now I did like what I saw, so I placed the leaves in an attractive composition and put the snail on these leaves to illuminate the scene from behind and get this photo.
After placing the sheets, I arranged two flashes with diffusers from the back and at 45º more or less with respect to the sheets, precisely so that the edge of all the sheets would be outlined by the lighting. Finally, I looked for some parameters that would allow me to have a good depth of field and that at the same time the only lighting that would affect the exposure was that of the flashes. The only difficulty in this shot has been the snail itself, we all know the slowness of these animals. However that continuous movement makes it get out of the frame very easily, to this we must add that I can choose in my mind where I want it to be the snail is present at the moment of the photo, however the snail is the one that chooses where it wants to go and it does not always coincide with my wishes.
The exif data for this photo is as follows: Canon 5D Mark III, Sigma 150 macro, f/18, 1/160seg, iso 200, tripod and two backlit flashes with diffusers.
It is true that in my case I do not like to abuse post-processing a lot, I am a person who likes to work on the photo in situ, and not later sitting in front of the computer. Although it is true that when shooting in Raw file, all photos need this post-processing. In this photo as in most of my photos the process is the same, the first thing I do after downloading the photo is to open it with the Canon Digital Photo Professional program and apply some small adjustments to exposure, contrast and focus. Next, I exported directly to Photoshop and here I first created a layer of levels to finish adjusting the exposure and a layer of curves to work the contrast more effectively, finally I applied a focus mask for the final result.